A Comprehensive Guide to Creating and Using Texture Maps in Lumion
Introduction
In the world of 3D design, texture maps play a crucial role in achieving realistic and visually engaging surfaces. This guide will explore the creation and application of various texture maps, including Normal Maps, Displacement Maps, Roughness Maps, and Metalness Maps. These tools are particularly valuable for architects, helping them enhance their projects while keeping the process straightforward and efficient.
Step 1: Understanding the Function of Texture Maps
Normal Maps
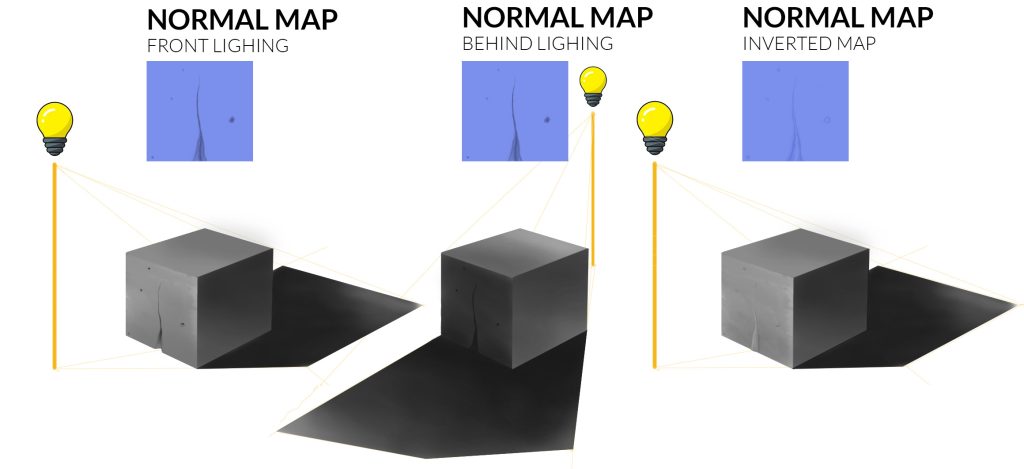
Normal maps are essential for simulating surface detail without increasing the polygon count of a model. By affecting how light interacts with the surface, these maps create the illusion of depth and texture, making 3D objects more lifelike.
How Normal Maps Work
Let’s take the example of a concrete texture applied to a flat surface. While the texture may include fine details, it remains visually flat because it lacks interaction with light sources in the scene. Adding a normal map allows the texture to respond dynamically to lighting, creating highlights and shadows that mimic real depth.
Simple Demonstration:
- Place a light source in front of a textured cube and observe how the normal map enhances the surface detail.
- Move the light behind the cube to see how the shading and highlights adjust, demonstrating the impact of the normal map on light interaction.
- Lumion has an option to invert the normal map, which can be useful in specific scenarios. Experiment with inverted versions to understand how it affects your material.
Displacement Maps
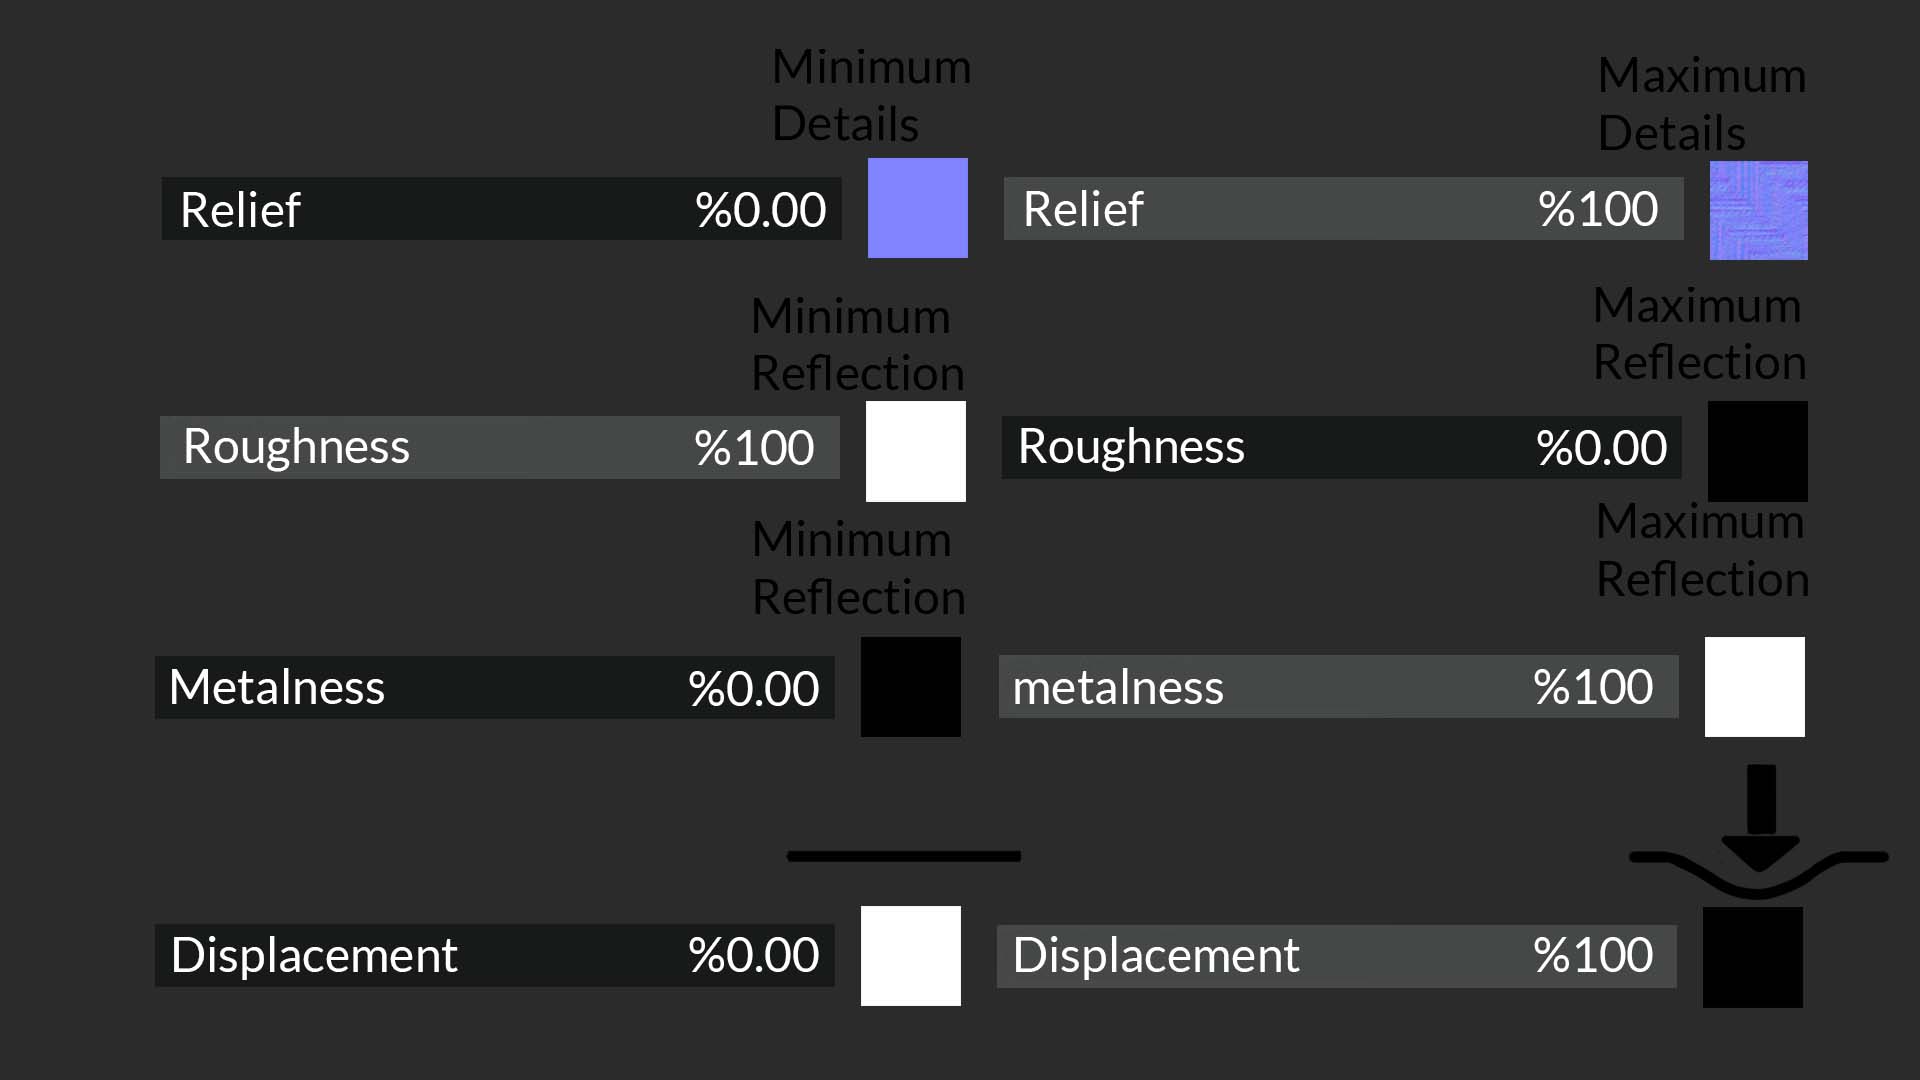
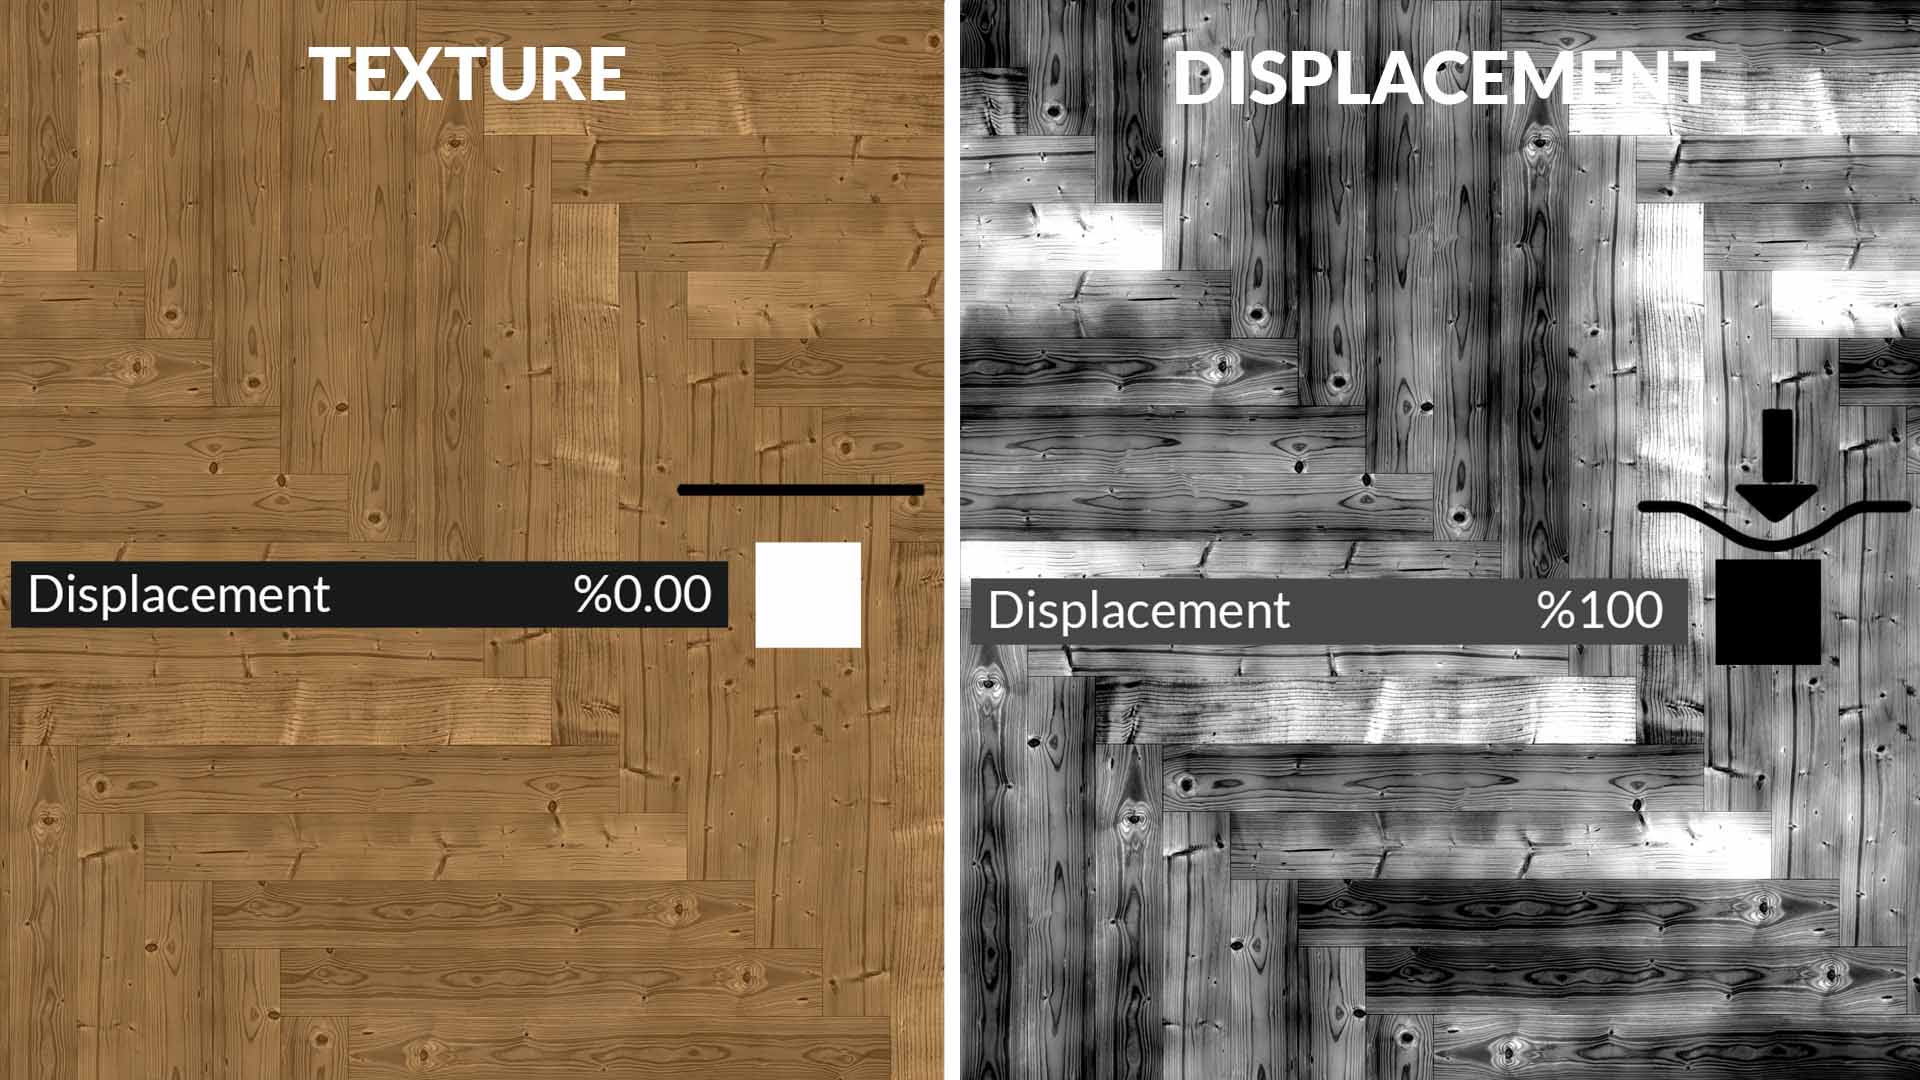
Displacement maps physically modify the geometry of a surface, creating true depth and relief that responds to light and shadow naturally. Unlike normal maps, displacement maps alter the actual mesh of the 3D object, making them ideal for close-up shots and high-detail renders.
- White areas: Represent unchanged surfaces.
- Black areas: Represent lowered or recessed regions.
- Gray gradients: Define varying levels of height between these extremes.
Tips for Lumion Users:
- Adjust the scale of the displacement map to align with the physical dimensions of your 3D model.
- For complex surfaces like bricks or carved wood, use a high-contrast displacement map to emphasize fine details.
Step 2: Reflectivity with Roughness and Metalness Maps
Roughness Maps
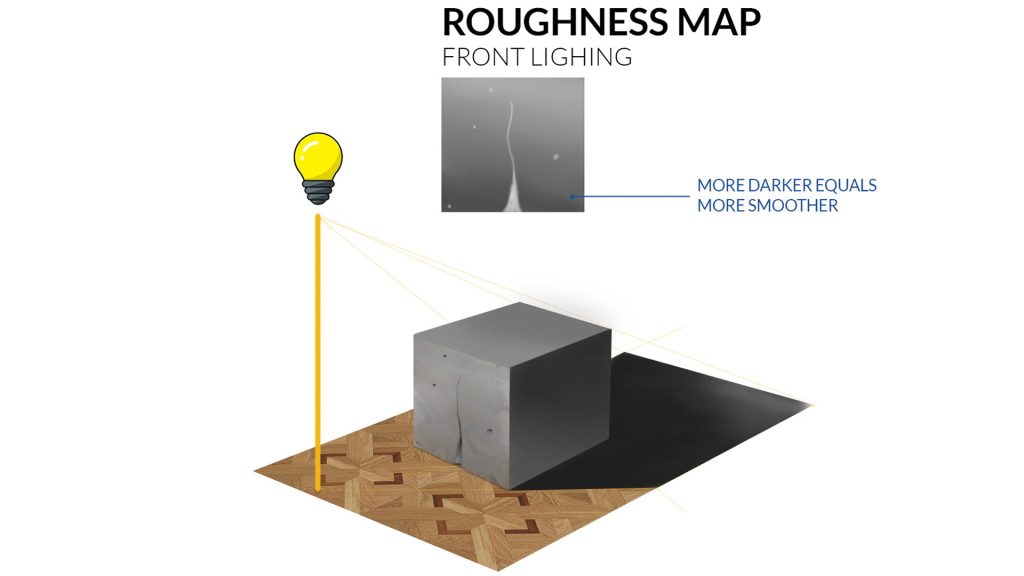
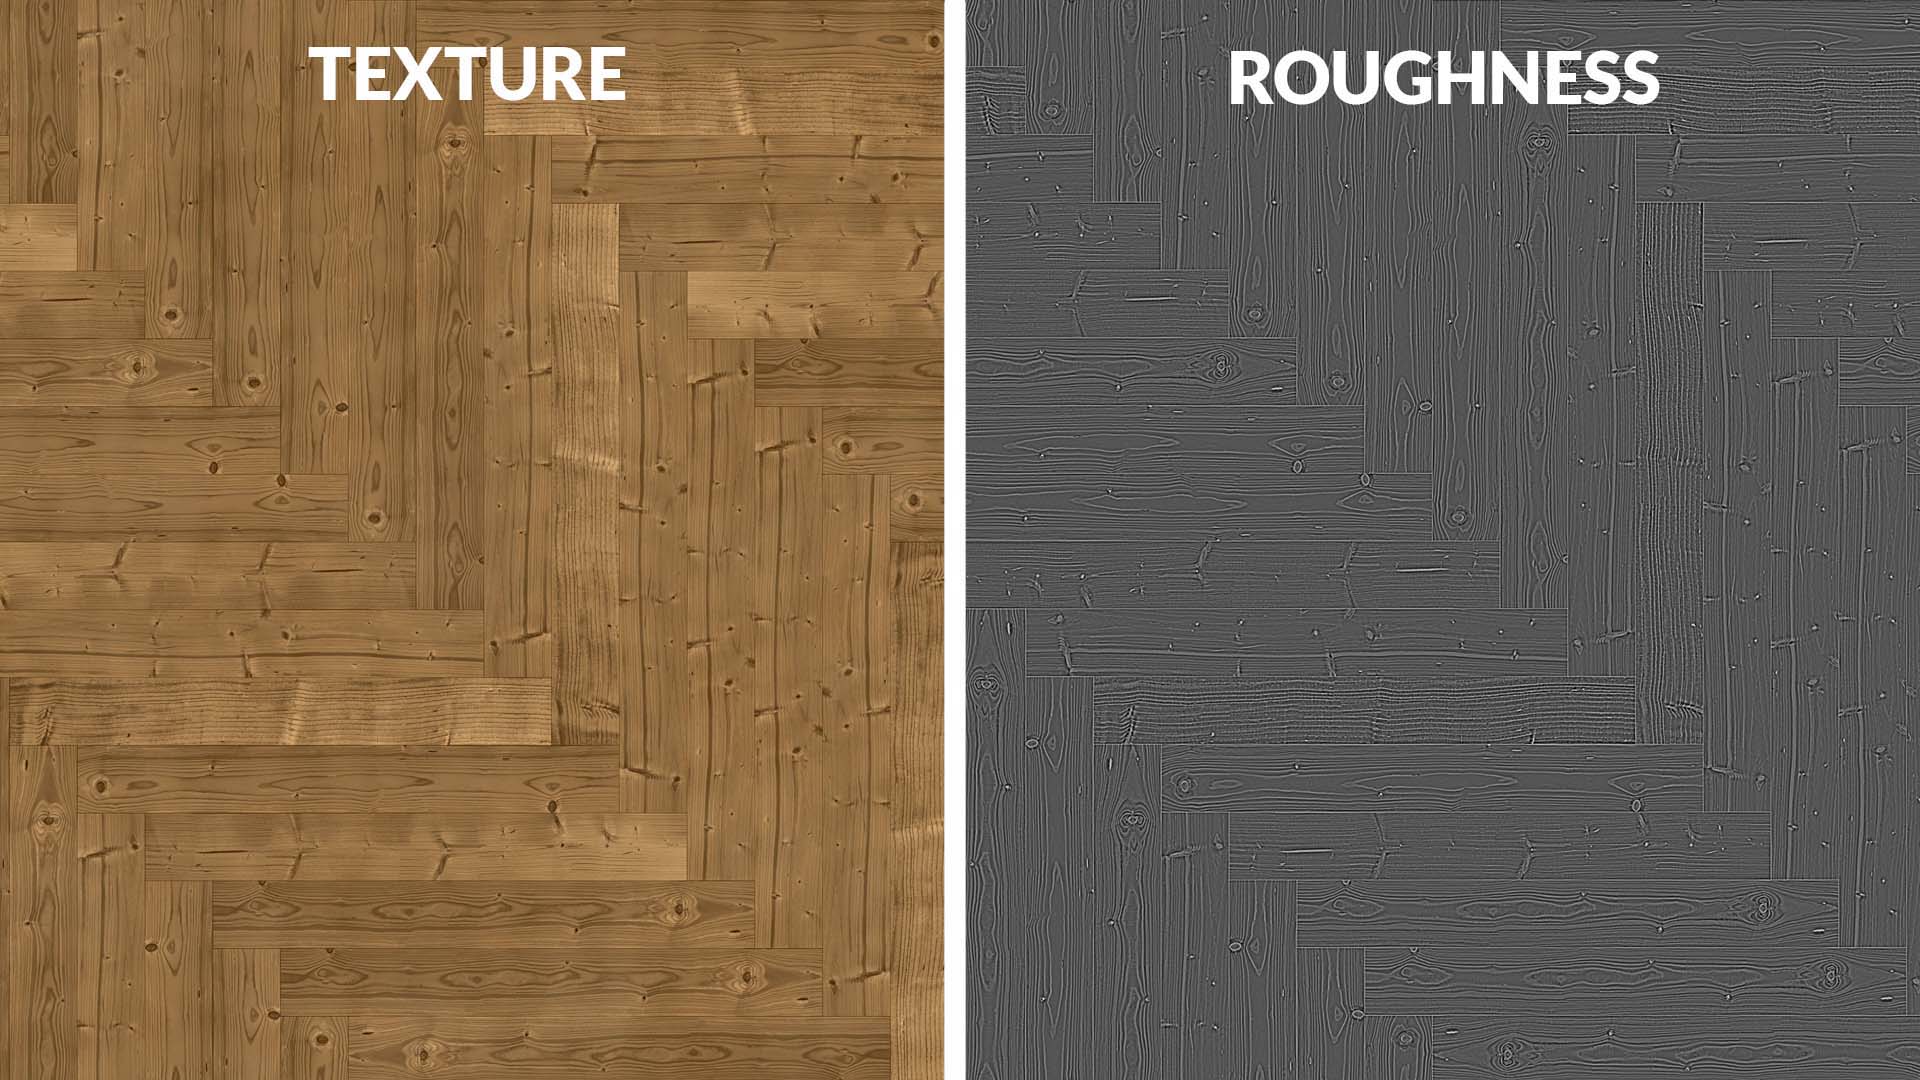
Roughness maps control how smooth or matte a surface appears by influencing its reflectivity.
How It Works:
- Darker areas: Indicate smoother surfaces with higher reflectivity (e.g., polished marble).
- Lighter areas: Represent rougher surfaces with less reflectivity (e.g., matte paper).
Creating Roughness Maps:
- Analyze your texture and decide where reflections should be more pronounced. For instance, on a wood texture, scratches or rough areas should appear less reflective, while smoother areas should reflect more light.
- Adjust the brightness and contrast of the map to define reflective regions accurately.
Practical Example:
For a weathered wood texture:
- Darken smooth regions to enhance their reflectivity.
- Brighten scratches and rough spots to reduce their reflective properties.
Metalness Maps
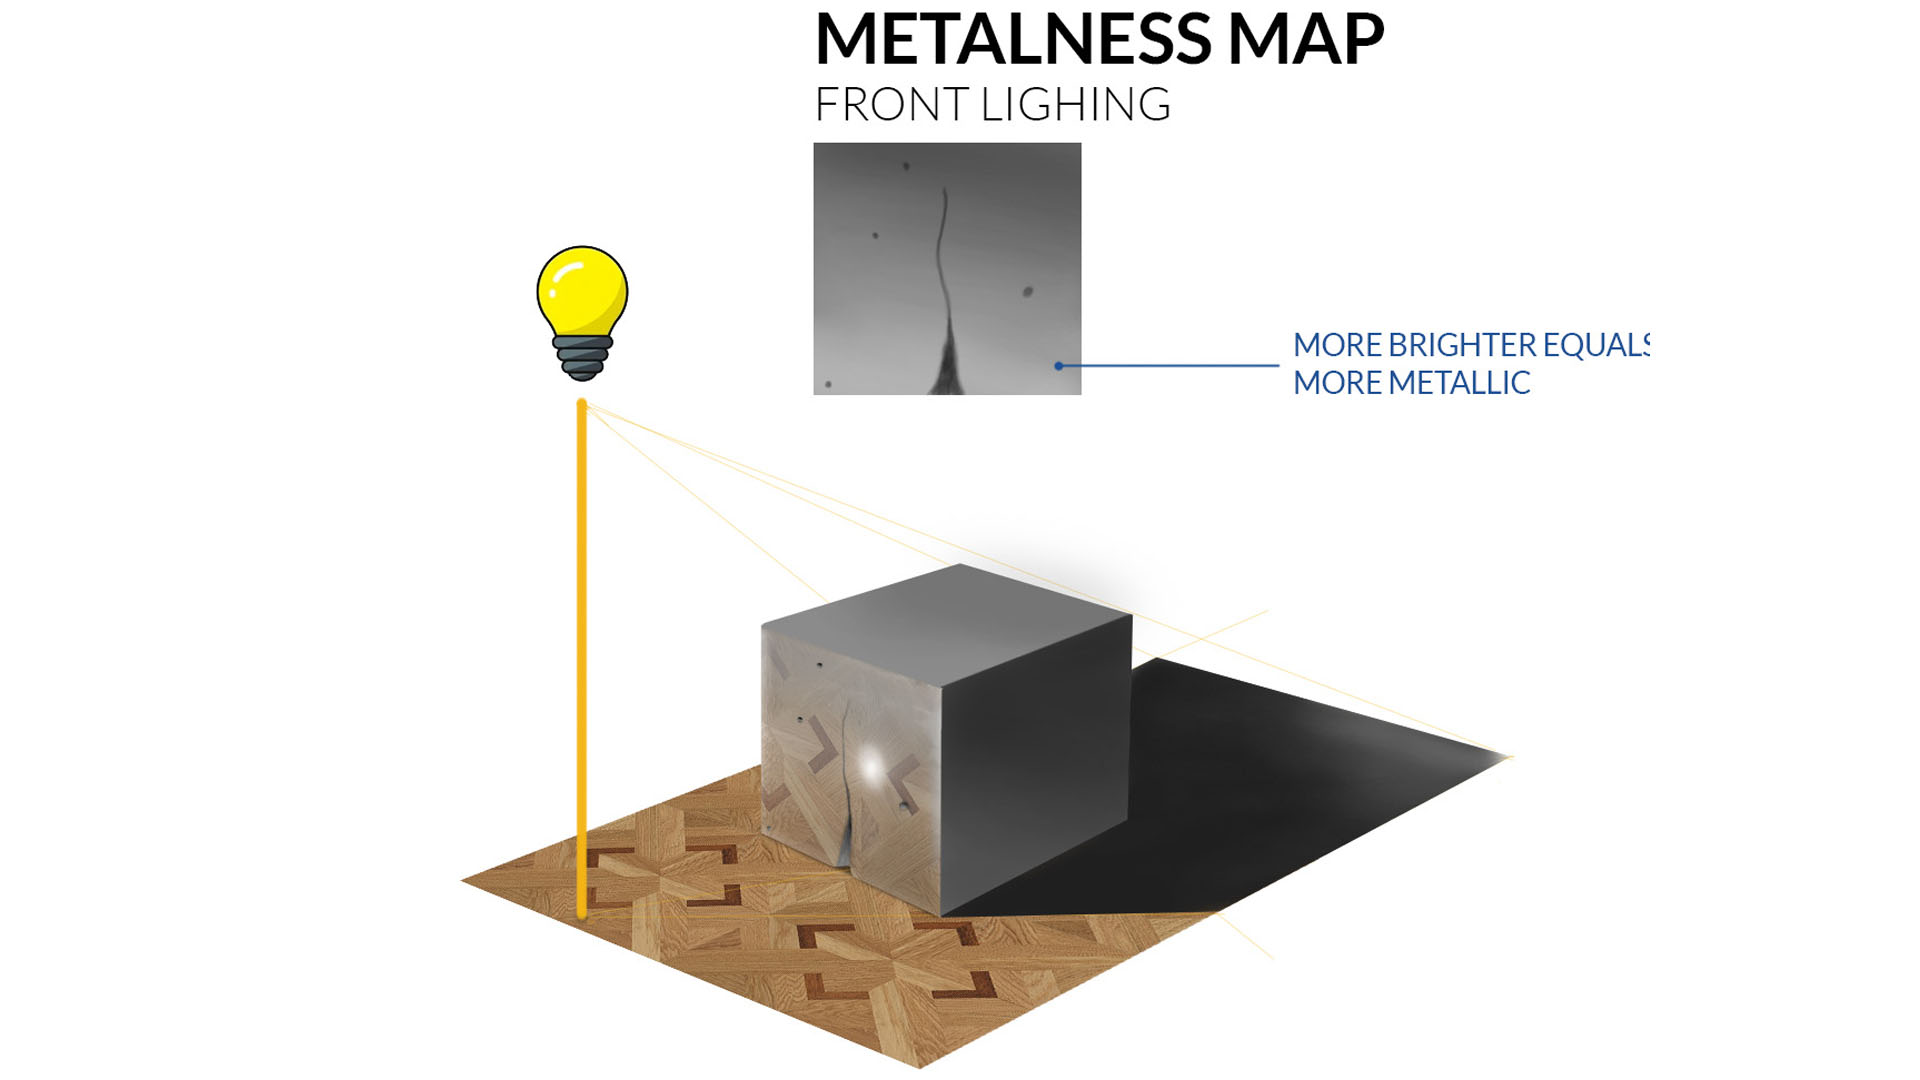
Metalness maps determine how metallic a surface appears and influence the type of reflections it produces.
Key Characteristics:
- Brighter areas: Represent metallic surfaces that produce sharp, intense reflections.
- Darker areas: Represent non-metallic surfaces with diffuse reflections.
Example:
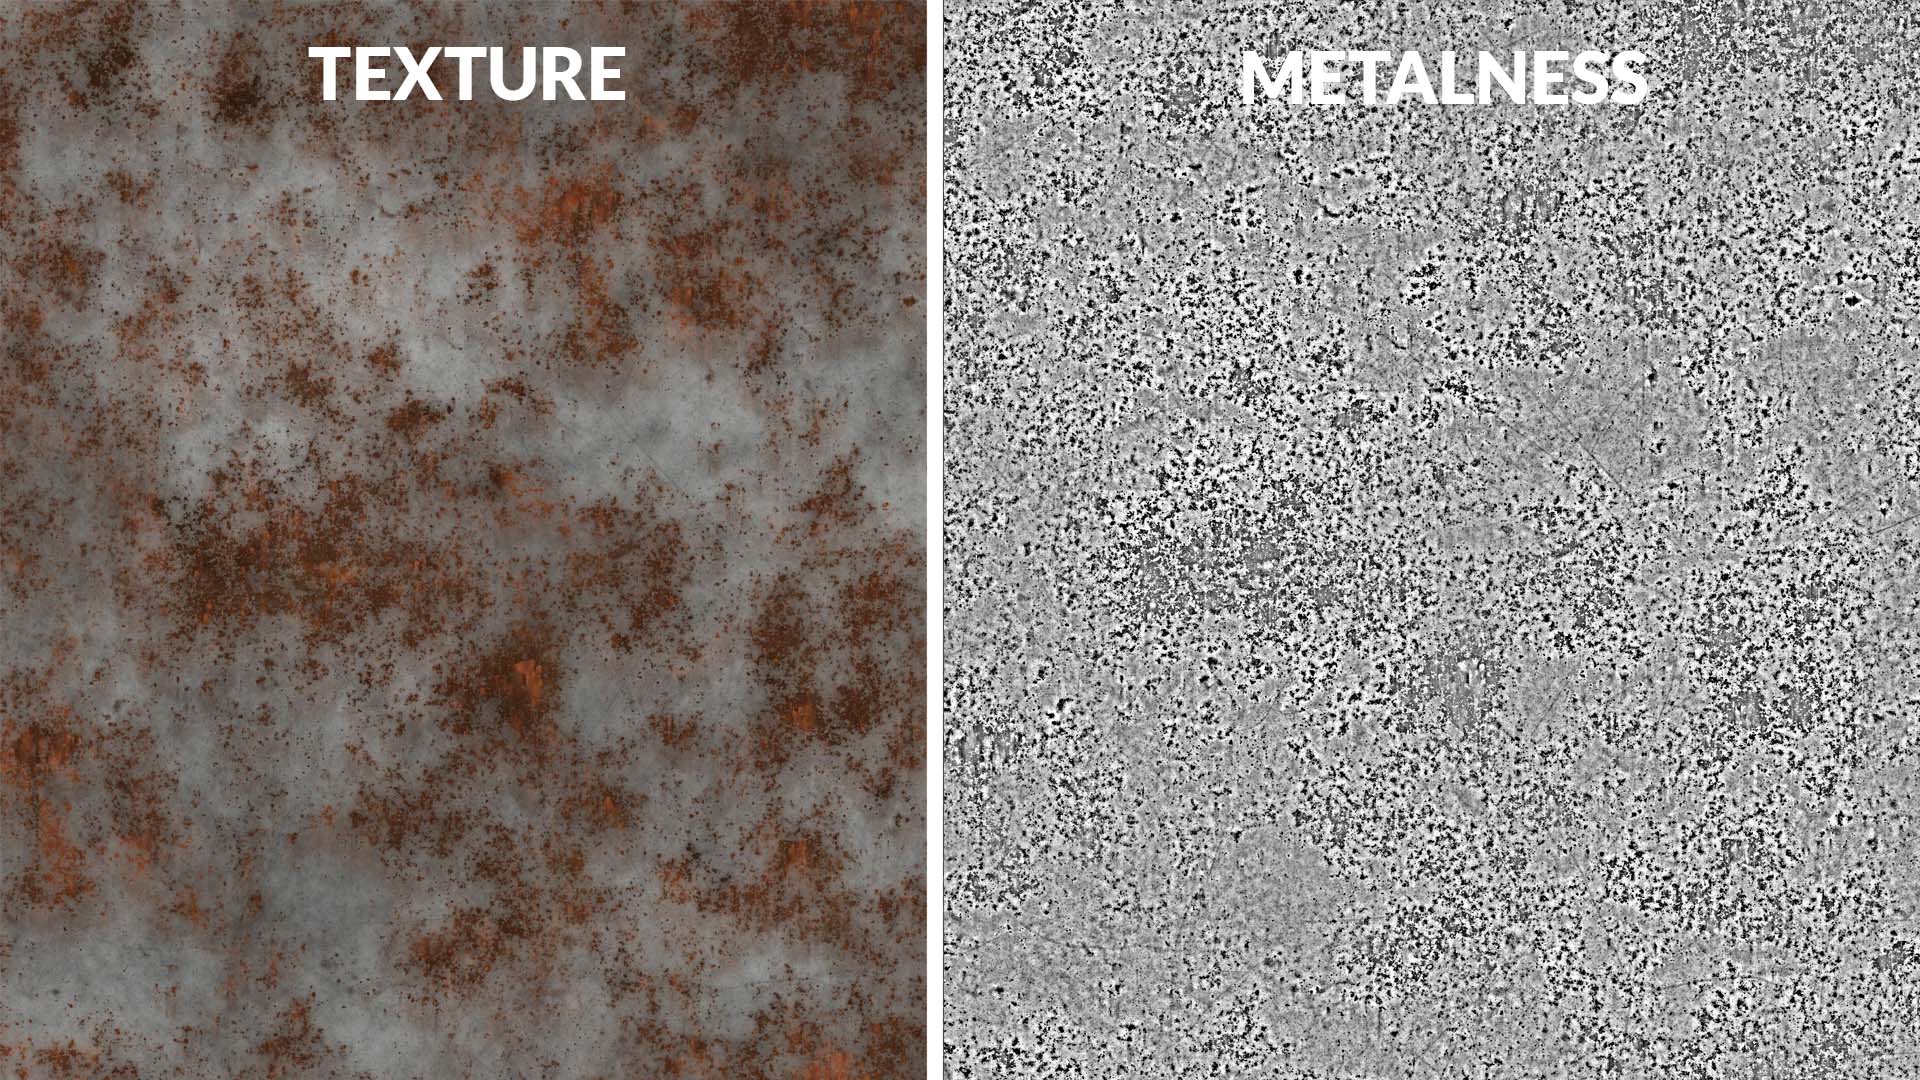
For a rusted steel texture:
- Highlight rust-free areas as bright regions to showcase their metallic nature.
- Darken corroded parts to represent their rough, non-metallic appearance.
Tips for Final Renders:
- Always test your textures with a sample render, as the preview may not fully represent the final result.
- Materials with reflective properties should be carefully evaluated under different lighting conditions to ensure they perform as expected.
Conclusion
Mastering texture maps unlocks a new level of realism and precision in 3D design. By understanding how each map works and learning to create them efficiently, you can elevate your projects and achieve stunning results. Whether you’re crafting detailed architectural visualizations or experimenting with materials, these tools are essential for any 3D artist or architect.